 Click the image to go to the blog!
0 Comments
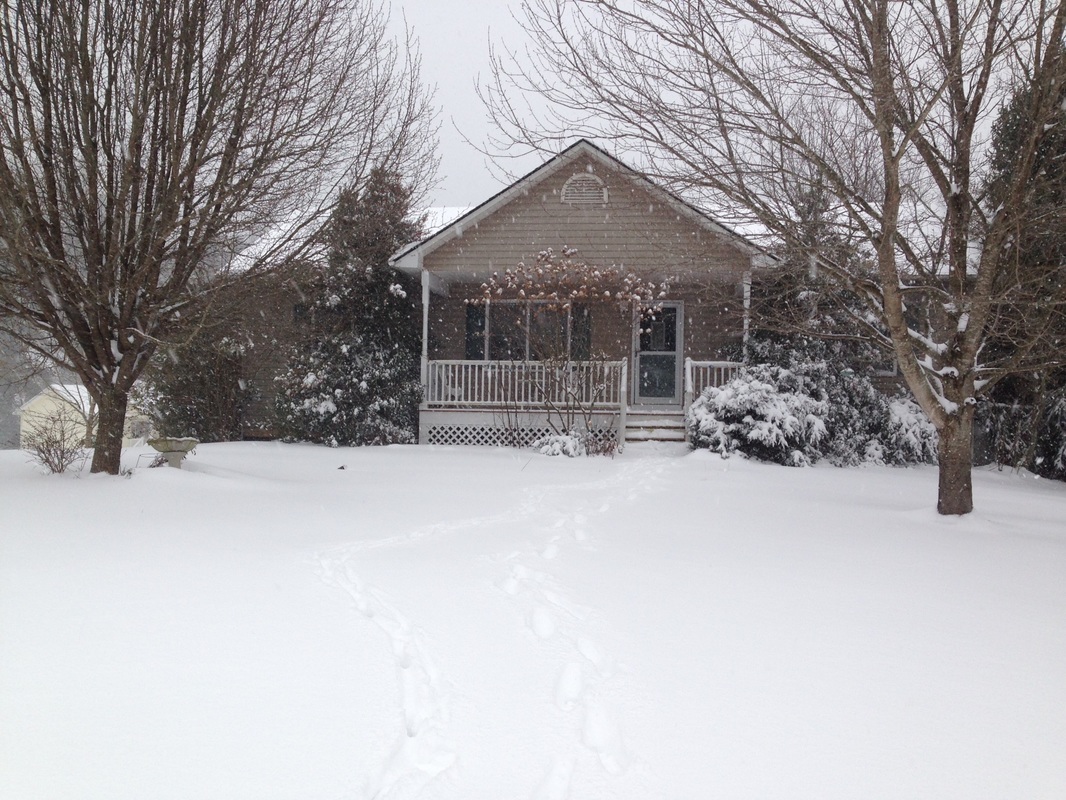 Most often, when there is snow forecast in Asheville, it's more bluster than actual snow. We'll get a dusting while the mountains around us get the predicted storm. That relative infrequency makes the idea of a storm kind of fun, for me, in a very nostalgic "I'm from Vermont, I want to see some snow!" kind of way. So we got the forecast, and this time my excitement was tinged with a bit of anxiety as I have travel and deadline schedules that require me to fire the big kiln on Monday, which requires that I get all my bisque fires done by today. The recent constant moisture in the air has made drying pots a near Olympic sport, and looking at the weather maps, I could see that we would indeed get some snow - yay! I managed to get the last bisque loaded and programmed to fire while the snow began, and an intrepid studio mate who lives slogging distance to the studio made her way in to make sure the kilns fired out safely.  So I sit here now watching it snow again, as it has more or less for the past 12 hours. It's a very relaxing, calming thing to be able to look out the window and watch the flakes float down and make a deeper and deeper cover on the neighborhood. Dog is very happy, cat isn't interested in dashing out the door today, and as there's no way for me to safely get to the studio, I'm choosing to take the unintended day off and worry about how I'll get all the pots glazed and the kiln loaded on Sunday. Too much beauty and quiet to disrupt it with worry! Today's comfort yumminess began with a little dabbling with cashew-butter based sauces. For New Year's brunch, it was a Hollandaise for a Crabcake Benedict, which was great and I immediately started thinking about how to tweak it for a cheesy sauce for a day just like today: Cashew Cheese & MacServes 4, or 2 very hungry people, or 1 snow-bound potter with plenty for leftovers! 2 cups raw cashews 2 Tablespoons fresh squeezed lemon juice 1 cup water 1 teaspoon salt 1/2 cup nutritional yeast 1 teaspoon roasted garlic (*could use 1/4 tsp. garlic powder) 1/4 teaspoon turmeric 2 good dashes cayenne pepper 1/4 teaspoon dry mustard (*could use wet dijon mustard) 1/4 teaspoon smoked paprika 1 1/2 cups elbow noodles (regular, wheat, gluten free - your choice) two handfuls chopped kale 1 cup frozen sweet peas 1 large stem broccoli, cut into small pieces Put a large pot of salted water to boil - it will hold the noodles and all the veg, so bigger than you might normally use. When it boils, add the broccoli stems, kale and frozen peas, and let it come back to a boil. When it boils again, add the noodles and cook to package directions, adding the broccoli crowns in the last minute or two.  While that's working, put the raw cashews in a food processor and process for about 2 minutes - you may have to pulse it at times. It will go from chopping/grinding the cashews to a rolling ball and ultimately to a paste/butter. After it has reached the last stage, add all the other ingredients but the water. Close the processor and start the machine, slowly pouring the water in until you reach your desired thickness (likely a cup, but could be a bit less or a bit more). Mix thoroughly and set aside. When the noodles have reached that perfect 'al dente', drain into a colander, retaining just a bit of the water in the bottom. Return the noodles and veg to the pan, and pour over as much of the cashew sauce as you like in your noodles (you should have some left over, but hey, who am I to judge if you decide it all needs to go in! Mix it up well, fill up a bowl and return to your position under a blanket on the couch and continue to watch the snow fall. 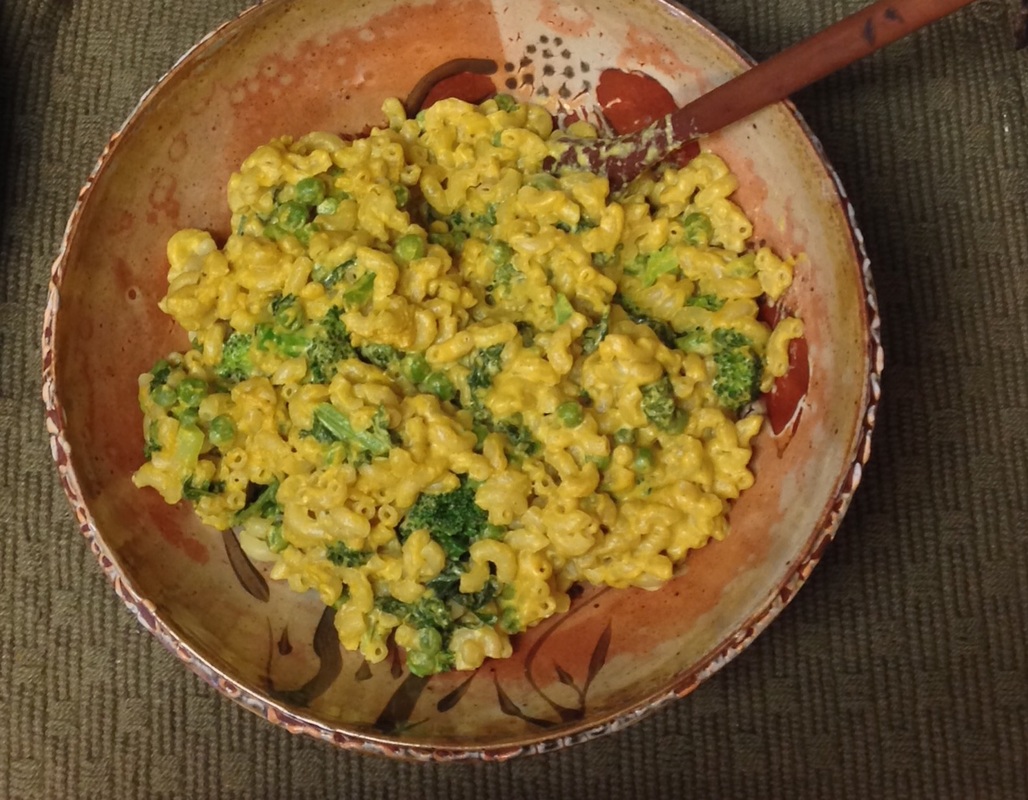 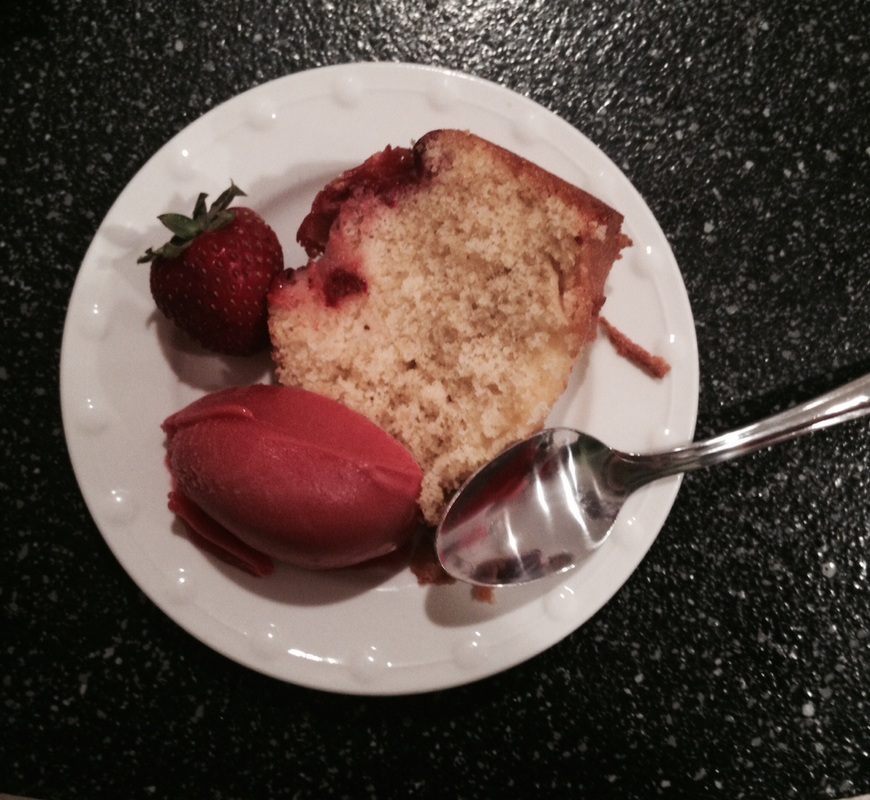
From Week 1 of my adventure cooking for 25+ for three weeks and one of my favorite creations so far. Lovely and simple, and not requiring terribly hard to find ingredients (I think if I can find everything at a Food Lion in Virginia Beach, it's accessible). I'm already thinking of variations... Gluten Free Strawberry-Lemon Cake Preheat oven to 350, and place rack in the middle of the oven. Spray or grease regular size bundt pan. 1 cup rice flour 3/4 cup fine ground corn meal (corn flour) 2 tsp. baking powder 1/4 tsp. salt 5 large eggs 1 tsp. vanilla 1 cup sugar 1/4 cup veg oil 1/2 cups quartered strawberries zest of 1-2 lemons confectioner's sugar Juice of four lemons In a small bowl, whisk together rice flour, corn meal, baking powder, and salt to combine. In a medium size bowl, whip the sugar into the eggs and vanilla until pale yellow (about 5 minutes). Add dry mix to eggs and mix slowly until incorporated. While mixing, add oil in a slow stream and mix till well combined. Gently fold strawberries and lemon zest into batter, then scrape into greased bundt pan. Bake for 35 minutes or until toothpick test in middle of the ring comes out clean. While baking, squeeze the juice of four lemons into a small bowl, then add enough confectioner's sugar to make a glaze (but not too thick). When the cake comes out of the oven, let cool on a rack (in the pan) for about 10 minutes. While it's in the pan, poke several holes all over the crust and drizzle about 1/4 of your glaze over it. When you take the cake out of the pan, invert it and let cool on the rack. As soon as you have it on the rack, poke holes on the top side, and drizzle the remaining glaze over the top of the cake. Serve with raspberry sorbet and fresh berries. 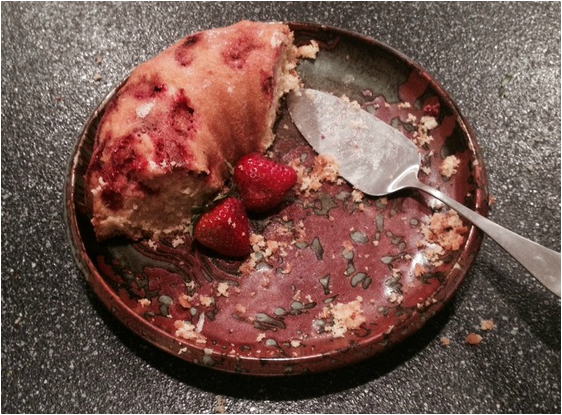
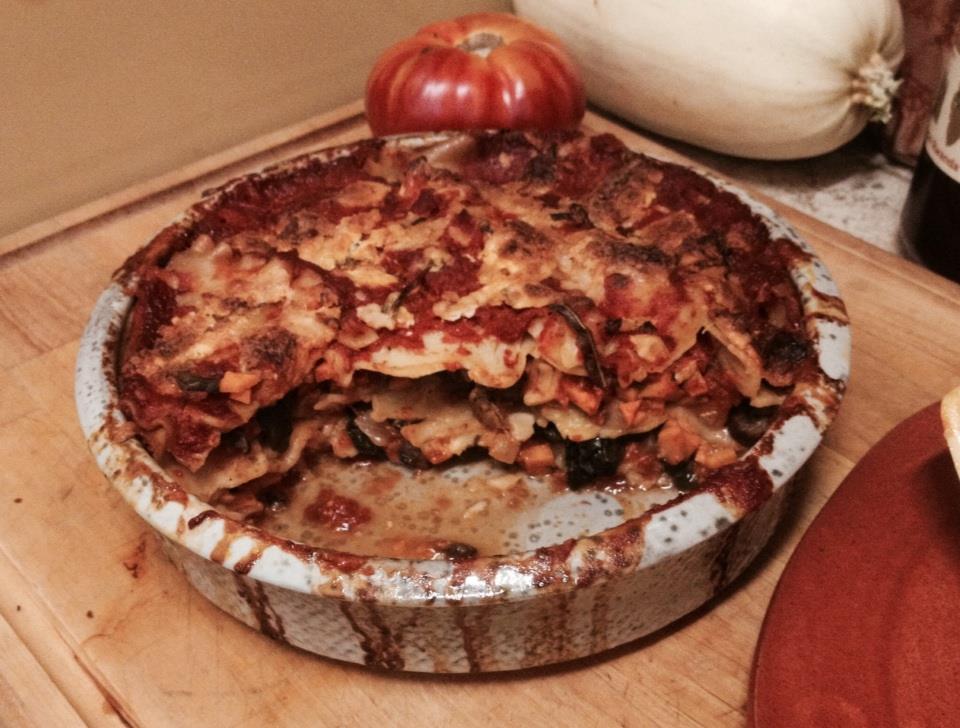
It might not be the dish you expect to see in the lazy days of summer, but we're not having many lazy days in the studio, and sometimes it's nice to have a bit of comfort food when you're toiling away in the clay! If you follow the Homemade Tastes Better on Handmade blog, you'll see that I talk about my recent affection for lasagna there, along with a description of another version. I say description, because this is dish was composed of some fresh ingredients, some leftovers, some prepared elements. Check the blog for a more thorough explanation of why this isn't a 'real recipe', and feel free to use it as a guideline for your own creation:
Chicken/Vegetable Lasagna Tinkyada Gluten Free Lasagna, blanched per package directions Large jar of Tomato/Basil Pasta Sauce Leftover roasted chicken, cut into small pieces 1 small sweet potato, cut into small dice 1/3 sweet onion, diced 2 cloves garlic, smashed then chopped 1 cup cremini mushrooms, sliced 4-5 leaves kale, chopped Sheep Cream Cheese Goat Feta Pecorino Romano Fresh Basil salt/pepper to taste *If using one of my bakers or another handmade baker, do NOT preheat your oven! Carry on: The only cooking prep (other than blanching the pasta sheets) was to saute the onion and garlic in some oil, then add the sweet potato, mushrooms, and kale for 3-4 minutes to soften, season to taste. Add about a cup of the pasta sauce and combine. Remove from heat and set aside. In a small bowl, combine the cheeses and the basil and blend with your hands. Set aside. In the lasagna pan, pour pasta sauce to cover the bottom, then dot with some of the cheese mix. Cover with blanched pasta sheets (if you're using a round pan like mine, just trim them to fit with scissors). Dot with cheese, then spoon the vegetable mix on top. Spread the roasted chicken on top of that, then top with a bit of sauce and dot with cheese. Lay another layer of pasta sheets, top with the rest of the sauce and dot with the rest of the cheese. Place the pan in the oven, and place a baking sheet with sides on the level below (to catch any burbling over sauce). Turn the oven on 350F and you should smell it in about an hour. Check for burbling sauce and browning cheese, if you find it, remove from the oven and let rest a few minutes before serving.
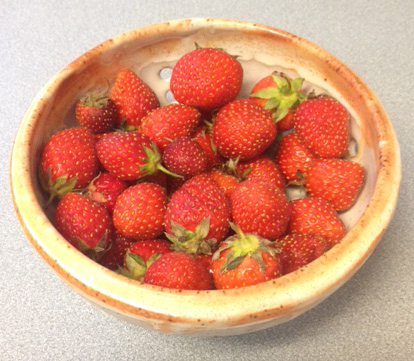
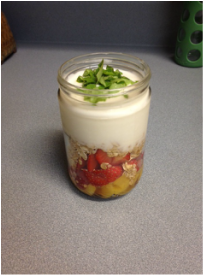
I've been enjoying a delicious strawberry season, and have shared a couple of quick and easy ways to use your bounty. Check them out and watch for more at the Homemade Tastes Better on Handmade Blog.
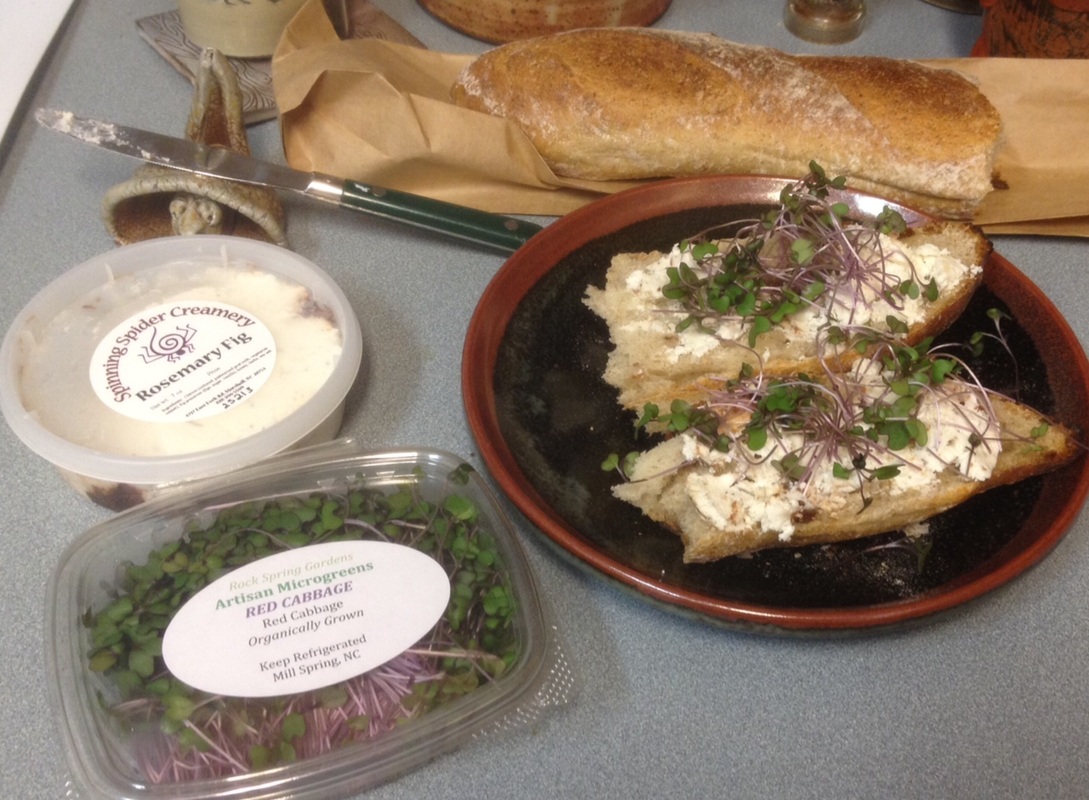 A very simple recipe for a lovely spring day in Asheville: Everything was sourced from the Tailgate Market for a quick and tasty lunch before heading into a full day at the studio:
Simple Bread baguette Spinning Spider Fig & Rosemary Chevre Rock Spring Gardens Red Cabbage Sprouts  With a little help from Nick...
A chilly winter morning inspired by quickly ripening bananas on the counter. You'll find the full recipe at the Homemade Tastes Better on Handmade blog. 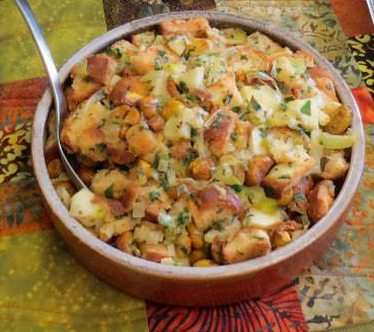 Or, Thanksgiving with a Hannukah Twist!
To celebrate the 'once in my lifetime' collision of Thanksgiving with Hannukah, I made a stuffing (although it wasn't...stuffed) with the good Thanksgiving flavors of roasted chestnuts and leeks and fennel, with a nod to Hannukah with apples and challah bread. I confess that while that all sounds very nicely planned to honor the holidays, a major motivation in each dish I prepared was how it would taste as a left-over. This was the first Thanksgiving in years that I was able to host, and I was very excited about having leftovers! As usual, I knew the flavors I wanted, and after scanning multiple recipes in books and online, this is what I ended up with (with a few improvisations while making, of course!): Ingredients: 6 cups (1/2-inch) Challah 3 large leeks (white and pale green parts only), cut into 1-inch pieces ½ large fennel bulb, thinly sliced 1 stick goat butter 2 celery ribs, sliced 1/4 inch thick 1 teaspoon chopped thyme salt and pepper 2 Granny Smith apples, peeled and cut into 1/2-inch cubes 3 cups roasted chestnuts (14 to 16 ounces), halved 1 cup Coconut Cream 1/2 cup chopped flat-leaf parsley Preparation Preheat oven to 350°F Bake bread cubes on a large sheet pan for about 15 minutes, in the upper third of the oven (you can also leave them out to dry for a couple of days if you plan ahead). Raise oven temperature to 450°F. Wash and prepare leeks and fennel. Melt butter in a 12-inch heavy skillet over medium heat, then cook leeks, fennel, and celery, covered, stirring occasionally, until softened, about 10 minutes. Add thyme, apples, 1 teaspoon salt, and 1/2 teaspoon pepper and cook, covered, stirring occasionally, until apples are just tender, about 5 minutes. Transfer to a bowl and toss with bread, chestnuts, coconut cream, and parsley. Add 1/2 teaspoon salt, and 1/4 teaspoon pepper and combine thoroughly. Spread in a 2 1/2-to 3-quart shallow baking dish. Bake, uncovered, in lower third of oven until heated through and top is golden, about 30 minutes. Leftover Report: Rich, yet light - very yum!  The latest in goodies that come from futzing around in the kitchen. Head over to the Homemade Tastes Better on Handmade blog for the recipe (well, as much of one as you get from me when I futz around in the kitchen!). 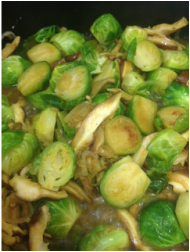 I have a Mocha Stout Braised Sprouts recipe here from a previous post, and that's a favorite during cooler weather. In the spring, a lighter touch is more appealing, and here's how the recipe has evolved to suit the season. Spring cooking for me is about simplicity and letting the flavors do their thing without a lot of bother. There are, as always, many variations. 1 pound brussel sprouts, trimmed & cut in half 2 shallots, cut in half and thinly sliced 2 cloves garlic, thinly sliced 3/4 cup vegetable broth 1/2 pound shiitake mushrooms, stems removed and thinly sliced salt & pepper 1 TBSP soy or tamari sauce Heat 1/8 cup of vegetable broth over med/low heat in broad, flat bottomed skillet. Add shallots and garlic, stir to coat with broth and cover to steam and soften for 2-3 minutes. Uncover, stir and salt/pepper to taste. Add brussel sprouts and spread across the pan, cut sides down. Let them sit like this for 3-4 minutes until they start to brown a bit on the cut side. Add shiitakes, stir to blend and add 1/4 cup vegetable broth. Stir briefly and adjust heat to keep it at a nice simmer, but not boiling. When the broth has cooked into the vegetables, add another 1/2 cup and repeat. When the liquid evaporates again, add 1/8 cup vegetable broth and soy sauce. Stir to blend, cover and let it continue to braise for a few more minutes. Uncover, stir, and continue to cook until the sauce is a thicker coating on the vegetables. Brussel Sprouts should be just tender but still with a bit of bite (cook longer if you like them softer, adjust cooking time to suit the way you like them). *Variatio |
Facebook • Twitter • Email • InstaGram
Recipes ArchiveHere's where you'll find all the recipes featured on the website. Some are presented in traditional format, others are more 'assemblage' recipes, combining ingredients that can be prepared a number of ways, and sometimes I'll present some ways. You're welcome to comment and offer your own versions! Archives
February 2019
Categories
All
|
 RSS Feed
Follow Us!

Instagram

Facebook
|
|

Blog coming back soon!
© 2022 Lori Theriault / All Rights Reserved
|